Steps to make bootable pendrive
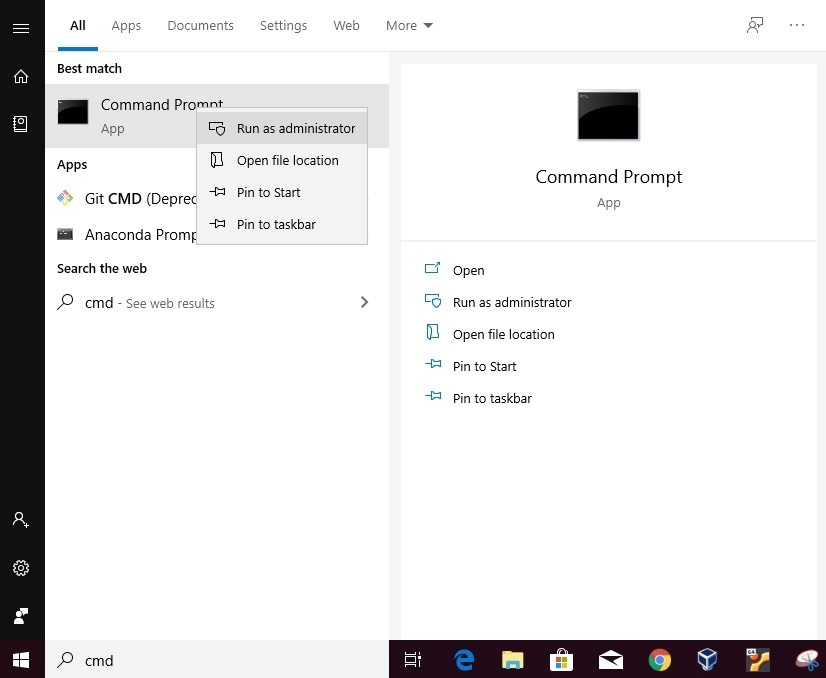
Step 1: Search for cmd in Start menu, right-click on the command prompt, click on Run as Administrator.
Step 2: Connect the USB device to the computer that is to be made bootable.
Step 3: Type the command ‘diskpart’ and then press Enter.
Step 4: Type the command ‘list disk’ to display a list of all the available storage devices on your system. Press Enter to continue.
Step 5: Select the disk that is your pen drive. Generally, it is marked as Disk 1, it might vary system to system. Make sure not to select any other available disk as it will get formatted. To choose the disk, type the command ‘select disk 1’ and press Enter.
Step 6: To make a pendrive bootable, there is a need to format it to clean the existing data. This can be done by the use of ‘clean’ command.
Step 7: Type the command ‘create partition primary’ and press Enter. This will make the disk primary and ready to be made bootable.
Step 8: To choose the partition created as primary, type the command ‘select partition 1’ and press Enter.
Step 9: Before making the disk bootable, there is a need to format it as NTFS because Windows uses NTFS file system for storage. This can be done with the use of command ‘format=fs NTFS’ and press Enter.
Step 10: Type the command ‘active’ and press Enter. This will mark the primary bootable partition as Active.
Boot-USB-using-CMD-08
Step 11: Type the command ‘exit’ to exit DISKPART and press Enter.
Everything is done
Good LucK


Thank You sir for your kind info.
ReplyDelete